
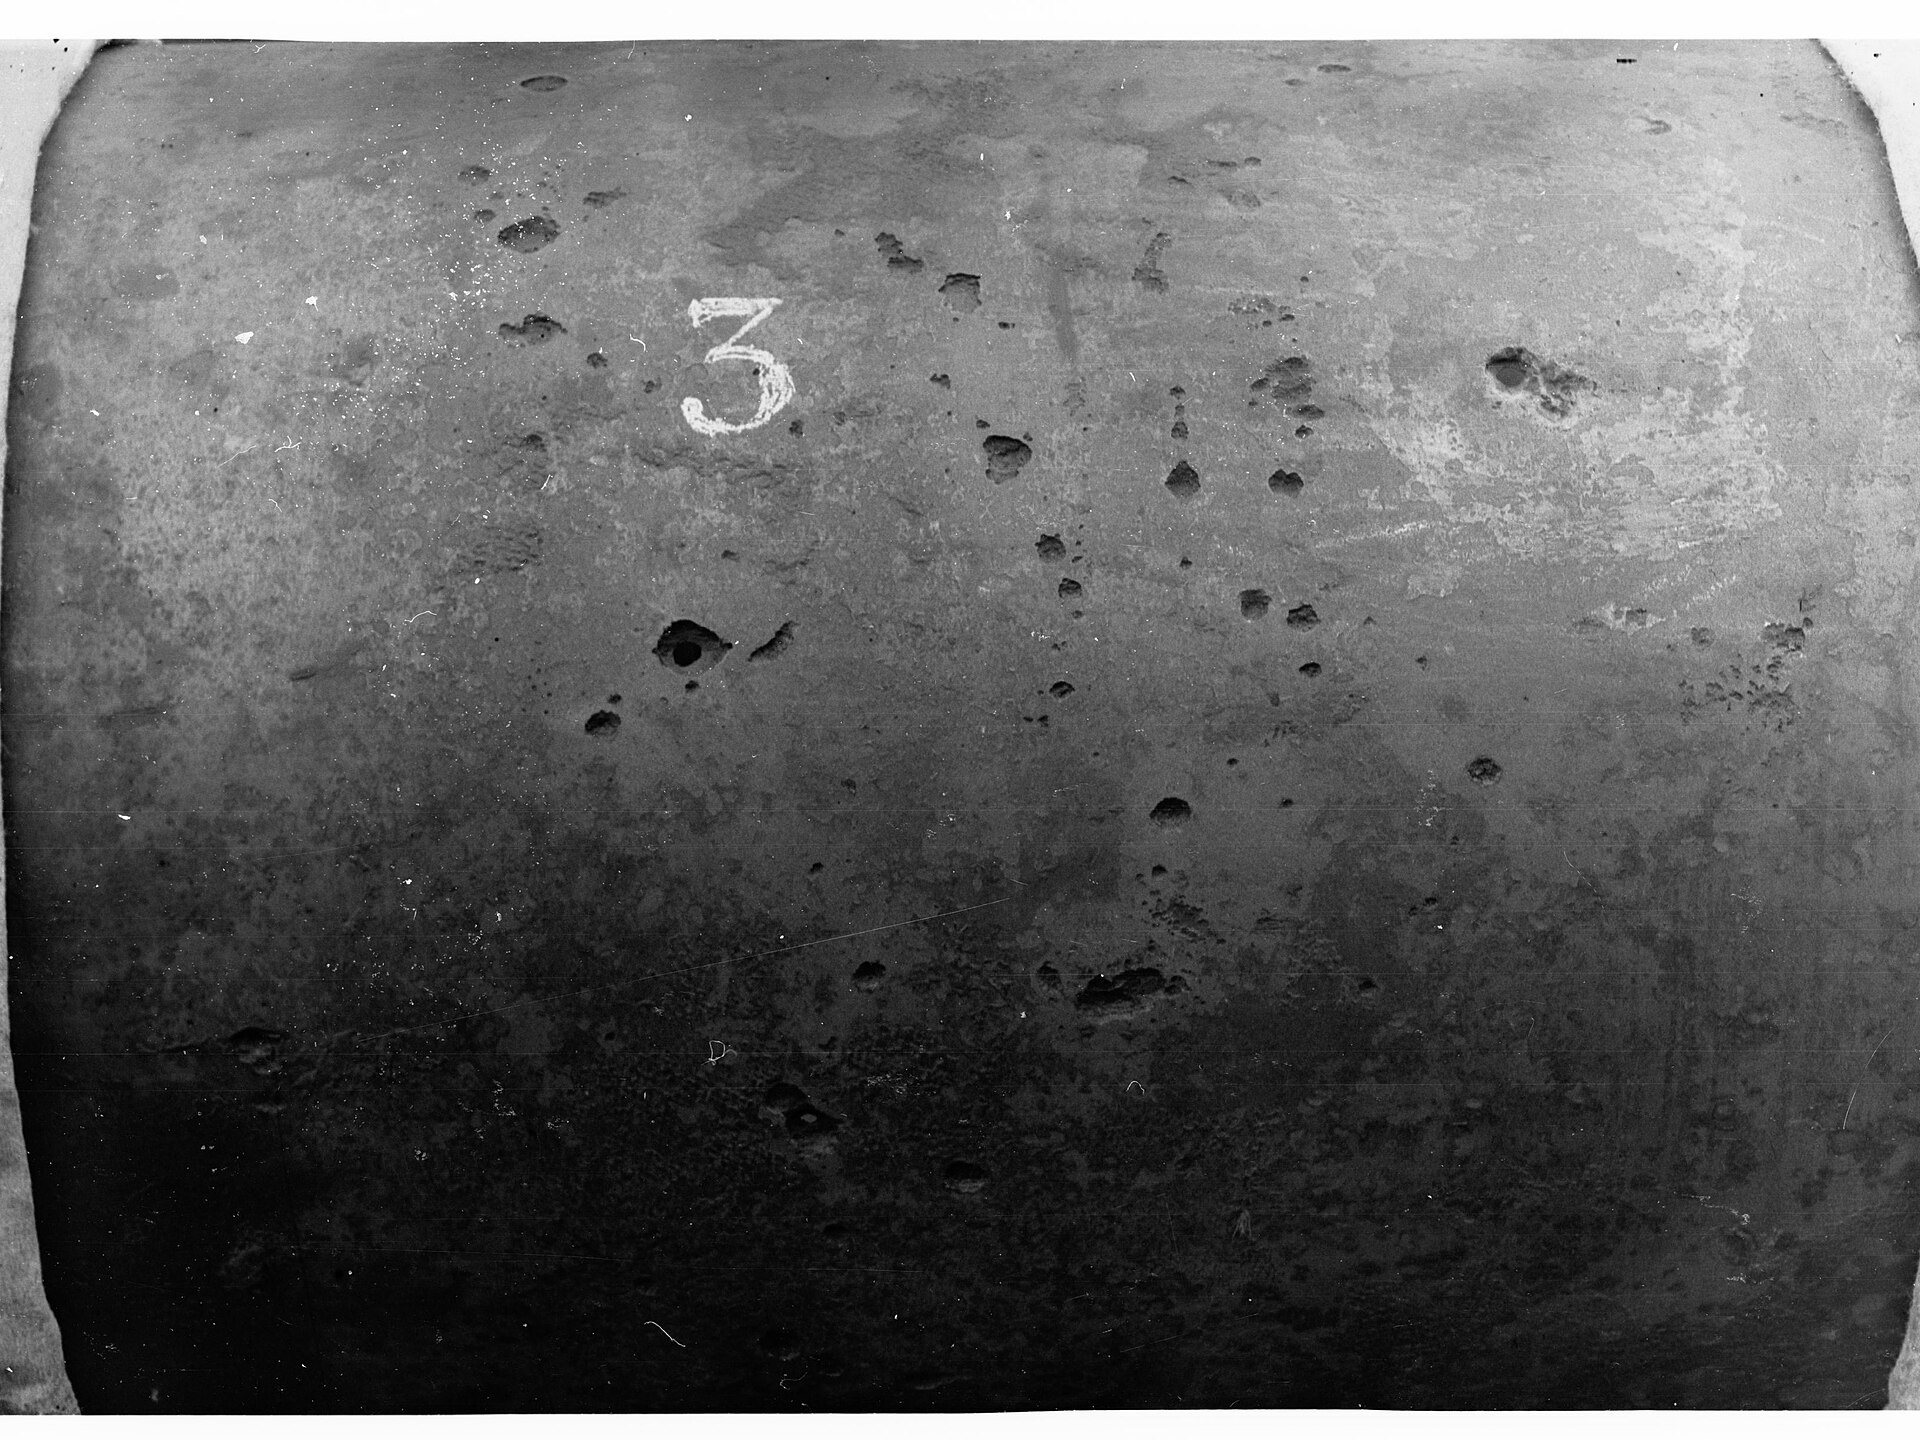
A rusty surface can look terrible without being deeply damaged.
A mostly clean-looking surface can contain a deep localized pit.
That is why surface appearance and corrosion severity are not the same thing.
When people look underneath a vehicle, they often judge corrosion by how much brown or orange rust they can see. That is understandable. Visible rust is easy to notice.
But corrosion engineers do not evaluate every kind of attack the same way.
Some corrosion is spread broadly across a surface.
Other corrosion is concentrated into small local areas.
Pitting belongs to the second category.
The difference matters because a small pit can penetrate much more deeply than the surrounding surface while contributing relatively little to the total area of visible rust or even to the overall mass loss.
So the useful question is not only:
“How rusty does this look?”
It is:
“How is the metal being attacked, and how much section thickness has actually been lost?”
Editorial disclosure: Underbody Lab did not conduct the corrosion tests discussed in this article. This guide explains published corrosion terminology and test methods so readers can better distinguish visible surface rust from localized pitting damage.
At a glance
| Feature | Broad surface rust / general attack | Pitting corrosion |
|---|---|---|
| Typical appearance | Rust spread across a wider area | Local cavities or pits |
| Distribution | More widespread | Concentrated at discrete sites |
| Visual severity | Can look dramatic | Can look minor from a distance |
| Depth | May be relatively shallow and widespread | Can be much deeper locally |
| Mass loss | Can contribute strongly to overall loss | Deep attack may occur with modest overall mass loss |
| Best evaluation | Area affected, mass loss, thickness change | Pit depth, density, distribution, maximum penetration |
| Main danger of visual-only judgment | Overestimating severity from appearance | Underestimating localized penetration |
These are not absolute categories for every real vehicle.
A corroded component can show both broad surface attack and localized pitting at the same time.
“Surface rust” is a descriptive phrase, not a complete diagnosis
People commonly use surface rust to describe corrosion that appears to be confined near the visible surface.
That can be a useful practical description.
But appearance alone cannot establish exactly how much sound metal remains.
A brown, rough or flaky surface may represent different amounts of actual section loss depending on:
- how long the corrosion has been active;
- whether the rust scale is loose or tightly adherent;
- whether attack is uniform or localized;
- whether pits exist underneath corrosion products;
- whether the component has already lost measurable thickness.
So “surface rust” should not be interpreted as a guarantee that damage is harmless.
It is a starting description.
Measurement is what establishes severity.
Pitting is localized corrosion
AMPP defines pitting as localized corrosion confined to a small area that forms cavities or pits.
ASTM G46 exists specifically to guide examination and evaluation of pitted metals in laboratory and field settings.
That matters because pitting behaves differently from corrosion spread more evenly across a surface.
A pit concentrates damage.
Instead of removing a small amount of metal everywhere, corrosion penetrates more deeply at selected locations.
A component can therefore retain most of its original surface while suffering much greater penetration at one pit.
Why a small pit can matter more than a large rusty area
Imagine two steel coupons.
Coupon A
- 30% of the surface is visibly rusty;
- the attack is shallow.
Coupon B
- only 3% of the surface is visibly affected;
- one pit penetrates much deeper.
Which one has the more serious problem?
You cannot answer from percentage of visible rust alone.
If the design concern is remaining wall thickness, the deepest localized attack may matter more than the total rusty area.
That is why ASTM G46 says the purpose of the evaluation determines the appropriate examination steps.
For some components, maximum pit depth can be more important than the amount of surface discoloration.
Mass loss and pit depth answer different questions
ASTM G1 covers preparation, cleaning and evaluation of corrosion test specimens.
It emphasizes both:
- mass-loss evaluation;
- pitting measurements.
Those two approaches are useful because they describe different aspects of damage.
Mass loss
Mass loss asks:
How much metal disappeared overall?
After corrosion products are removed appropriately, the change in specimen mass can be used to quantify total metal loss.
Pit depth
Pit measurements ask:
How deep did localized attack penetrate?
A specimen can have relatively modest overall mass loss while still containing a deep pit.
That is why one number should not automatically replace the other.
Why average corrosion can hide local penetration
Suppose a steel panel loses the same amount of metal overall in two hypothetical tests.
In the first test, the loss is distributed relatively evenly.
In the second, most of the surface remains intact while one small area penetrates deeply.
The average metal loss may be similar.
The risk may not be.
This is one reason engineering corrosion analysis distinguishes general corrosion from localized corrosion.
AMPP defines localized corrosion as corrosion occurring at discrete sites, with pitting and crevice corrosion as examples.
When localized attack is the failure mode that matters, an average can hide the worst location.
The deepest pit is not the same thing as the average pit
Even within pitting corrosion, one measurement may not tell the whole story.
A test program may examine:
- maximum pit depth;
- average pit depth;
- pit density;
- pit size;
- pit distribution.
Maximum depth asks about the worst penetration found.
An average or median pit-depth value depends on how the test defines the pits being measured. ASTM G46, for example, discusses evaluating the deepest pits rather than treating an average as a simple description of a ‘typical’ pit.
Density describes how many pits occur over a given area.
Distribution shows whether they are spread randomly, clustered or concentrated at specific locations.
These measurements can tell very different stories.
For example, ten shallow pits and one very deep pit are not equivalent to eleven equally shallow pits.
Corrosion products can hide the true pit shape
A pit is not always an obvious clean hole.
Corrosion products can partially cover or fill localized attack.
AMPP notes that pitting can be difficult to detect because corrosion products may cover pits.
That is one reason visual inspection alone can underestimate localized corrosion.
Cleaning and examination procedures matter.
ASTM G1 emphasizes removing corrosion products without significant removal of base metal so that mass loss can be determined accurately; the standard also covers evaluation involving pitting measurements.
That balance matters because overly aggressive cleaning could exaggerate apparent metal loss, while inadequate cleaning could hide the actual pit.
Pits can have different shapes
Localized cavities are not all shaped the same way.
A pit may be:
- broad and shallow;
- narrow and deep;
- undercut beneath the surface;
- irregular;
- clustered with other pits.
Two pits with the same opening size can therefore have very different depths.
This is another reason photographing only the top surface may not describe the actual severity of localized damage.
The opening you can see is not necessarily the full volume of metal that has been lost.
Chlorides are especially important to pitting discussions
Chlorides are important in many corrosion environments because they can contribute to localized attack under appropriate material and environmental conditions.
For vehicles, chloride contamination can come from winter road salts.
But it would be too broad to say that road salt automatically causes deep pitting everywhere it touches.
Pitting depends on the material, protective films, coating condition, moisture, geometry and local environment.
Article #8, Why Cars Rust Faster in the Snow Belt, explains the broader role of chlorides, moisture and time of wetness in winter corrosion.
The key point here is narrower:
chloride exposure is one reason localized corrosion deserves attention instead of judging only visible rust coverage.
Coatings can change what you see
An undercoating or paint film may hide some of the metal surface.
That creates an interpretation problem.
A coating can look mostly intact while corrosion develops:
- at a scratch;
- at an exposed edge;
- beneath a damaged area;
- inside a seam;
- under a local adhesion failure.
This does not mean coatings generally “trap rust.”
It means inspection of coated systems has to consider where corrosion can initiate and whether the coating prevents direct visual access to the substrate.
Article #11, Why One Rust Spot Doesn’t Tell You How Well an Undercoating Works, explains why failure location and repeatability matter when judging coating performance.
Rust around a scratch is not the same as broad film failure
A scratch or scribe intentionally exposes metal.
If corrosion develops there, the useful question is often:
How far did corrosion spread from the damaged area?
ASTM D1654 includes evaluation of corrosion behavior and loss of adhesion associated with a scribe after corrosive exposure.
That is different from claiming that the entire coating failed.
Likewise, one pit near a damaged location and widespread attack underneath an intact coating are not the same failure pattern.
The location of the corrosion matters.
Surface rust can still be serious
It would be a mistake to interpret this article as:
“Surface rust is harmless.”
It is not.
Broad corrosion can:
- continue removing metal;
- create scale;
- reduce section thickness;
- spread into seams;
- undermine coatings;
- make later inspection more difficult;
- conceal localized attack underneath.
A component with widespread surface corrosion may need cleaning, measurement or professional inspection before anyone can judge how much structural metal remains.
The point is simply that visual area and penetration depth are different variables.
Pitting can also be shallow
AMPP notes that pitting is generally considered more dangerous than uniform corrosion because it can be harder to detect, predict and design against.
That does not mean every pit is more severe than every case of broad corrosion. Some pits are shallow, while widespread corrosion can also produce serious section loss.
The word “pitting” does not automatically mean catastrophic damage.
A pit is a localized cavity.
Severity depends on:
- depth;
- remaining material thickness;
- location;
- component loading;
- number of pits;
- whether pits are growing;
- whether they occur near stress concentrations or seams.
So the correct conclusion is not:
“Pitting is always worse than surface rust.”
It is:
“Pitting requires a different type of evaluation because localized depth can matter more than surface coverage.”
Why component thickness changes the meaning of a pit
A 1 mm pit means something different on:
- a thick frame member;
- a thin brake shield;
- thin sheet metal;
- a structural bracket.
The percentage of remaining thickness matters.
A localized cavity that removes a small fraction of a thick component may be less concerning than the same depth on a thin sheet.
That is why corrosion severity cannot be judged from pit depth alone without considering the original section thickness and function of the component.
Underbody Lab should therefore avoid universal statements such as:
“A 1 mm pit is safe”
or:
“A 1 mm pit means replacement.”
Those decisions depend on the actual part and engineering requirements.
Why photographs can mislead
Photos are useful for documenting:
- color;
- rust coverage;
- scale;
- visible pits;
- coating damage.
But photographs have limitations.
Lighting can exaggerate orange staining.
Loose rust can look severe while hiding relatively shallow attack.
A dark cavity can appear deeper than it is.
A pit filled with corrosion products may barely show at all.
So a photograph should be treated as visual evidence, not as a direct thickness measurement.
This becomes especially important in online product comparisons where readers may see only one “before and after” image.
A better inspection approach
When practical and safe, evaluating a corroded area is stronger when it separates three questions:
1. How much area is affected?
This describes the extent of visible corrosion.
2. How much total metal has been lost?
Laboratory testing may answer this through controlled mass-loss measurements.
Field inspections may use other thickness or condition assessments.
3. What is the deepest localized attack?
This addresses pitting and worst-case penetration.
Those three answers together tell you far more than “it looks rusty.”
Why cleaning changes what you can evaluate
Loose corrosion products can obscure the metal underneath.
That means inspection before cleaning and inspection after cleaning answer different questions.
Before cleaning you can document:
- visible rust;
- scale;
- coating condition;
- contamination.
After controlled cleaning, you may be able to evaluate:
- actual surface profile;
- pits;
- perforation;
- remaining metal condition.
But aggressive cleaning can itself remove material.
That is why standardized corrosion testing uses defined cleaning procedures instead of simply grinding until the surface looks clean.
What this means for rustproofing product tests
If an undercoating test reports only:
“10% rust after 500 hours”
that may be useful, but it is incomplete.
A stronger report asks:
- Is the rust superficial or pitted?
- Is it concentrated at scratches or edges?
- How deep is the localized attack?
- Was corrosion underneath intact coating or only at intentional defects?
- Was total metal loss measured?
- Were several specimens tested?
- Did the same failure pattern repeat?
That is how a test moves from appearance toward engineering evidence.
What this means for a real vehicle
For a vehicle owner, visible surface rust should be treated as a reason to inspect further, not as a complete diagnosis.
Likewise, a mostly clean-looking underbody should not be assumed to have zero localized corrosion in hidden locations.
Areas that deserve attention include:
- seams;
- drainage points;
- damaged coating;
- exposed edges;
- fastener locations;
- areas that hold mud or salt;
- cavities that are difficult to inspect.
Article #13 will examine why seams, moisture and crevices can create different local corrosion conditions from open flat surfaces.
What Underbody Lab will distinguish in future tests
If Underbody Lab performs original corrosion testing, “amount of rust” should not be a single catch-all score.
Depending on the question, useful reporting could separate:
- percentage of visibly rusted area;
- mass loss;
- maximum pit depth;
- average pit depth;
- pit density;
- failure location;
- scribe creep;
- coating loss;
- specimen-to-specimen variability.
That does not mean every test needs every measurement.
It means the metric should match the failure mode being studied.
Bottom line
Surface rust and pitting are not interchangeable descriptions.
Broad visible rust tells you that corrosion is affecting an area.
Pitting tells you that attack is localized into cavities.
One can look dramatic while remaining relatively shallow.
The other can occupy a small area while penetrating much more deeply.
Neither should be judged from appearance alone.
The better questions are:
- How much area is affected?
- How much metal has been lost overall?
- What is the deepest localized attack?
- Where is the corrosion occurring?
- How much original section thickness remains?
- Is the same failure pattern repeating?
A rusty-looking surface may need less repair than its appearance suggests.
A small pit may need more attention than its appearance suggests.
The measurement — not the color — tells you which is which.
Learn more: Why Cars Rust Faster in the Snow Belt · Does Salt Spray Testing Predict Real-World Rust Protection? · How Rust Protection Products Are Actually Tested · Why One Rust Spot Doesn’t Tell You How Well an Undercoating Works · How to Prepare a Rusty Truck Frame for Undercoating · Rust Prevention · Undercoating
Sources
- ASTM International — ASTM G46-21, Standard Guide for Examination and Evaluation of Pitting Corrosion. Active edition. Covers destructive and nondestructive evaluation of pitted metals in laboratory and field applications and emphasizes that the purpose of the investigation determines the appropriate evaluation approach.
- ASTM International — ASTM G1-25, Standard Practice for Preparing, Cleaning, and Evaluating Corrosion Test Specimens. Active edition. Covers preparation, corrosion-product removal, mass-loss evaluation and pitting measurements.
- AMPP — Pitting Corrosion. Defines pitting as localized corrosion that produces cavities and explains why localized penetration can be difficult to detect and significant despite limited overall metal loss.
- AMPP — Corrosion Terminology: P. Defines pitting and pitting factor, including the relationship between deepest-pit penetration and average penetration calculated from mass loss.
- AMPP — Corrosion Terminology: L. Defines localized corrosion as corrosion occurring at discrete sites, including pitting and crevice corrosion.
- ASTM International — ASTM D1654-24e1, Standard Test Method for Evaluation of Painted or Coated Specimens Subjected to Corrosive Environments. Covers evaluation of corrosion behavior, corrosion-associated blistering, loss of adhesion at a scribe and other coating failures after corrosive exposure.
Featured image: “Rust Pits in surface of Steel Water Pipe” (1925, State Government Photographer; History Trust of South Australia), via Wikimedia Commons, CC0 1.0 public-domain dedication. Cropped and displayed in grayscale. This is a historical archive photo, not an Underbody Lab test.
.jpg)